
|
|
Comments: This is the third and final use of Obverse 2 and the first of two uses of Reverse C. |
Obverse 2 The photo below shows the Obverse 2 attribution. 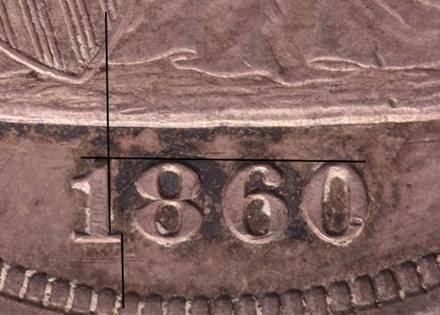 1860 Obverse 2 attribution grid The only barely notable Obverse 2 die markers are some faint die lines in the denticles opposite stars 5-7, shown in the photo below. 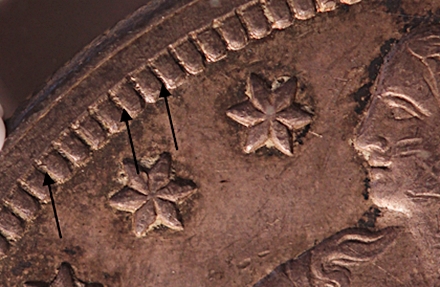 1860 Obverse 2 die lines in denticles
 1860 Obverse 2 die line in gown - State b |
Reverse C displays one notable marker, a large die chip off the bottom of the middle arrow shaft, joining the shaft to the upper tip of the lower arrowhead. 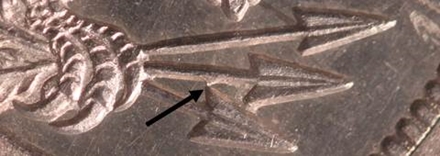 1860 Reverse C die chip
|
| Photo credits: Obverse 3: 1860 NGC MS62, from the Osburn-Cushing reference collection. Reverse C: 1860 NGC MS62PL, from the Osburn-Cushing reference collection. |